In Step 2 we downloaded the FileMaker Admin Console and you are eager to upload your database but there is one more thing that we need to do to make sure everything is set in your database to be shared over the internet. If you have already set your security settings and extended privileges then you can skip to Step 4 but it does not hurt to review!
- Open your database in FileMaker Pro and navigate to the menu File-->Manage-->Security
- This will bring you to the "Accounts" window. If you do not have any users listed then click the "New" button.
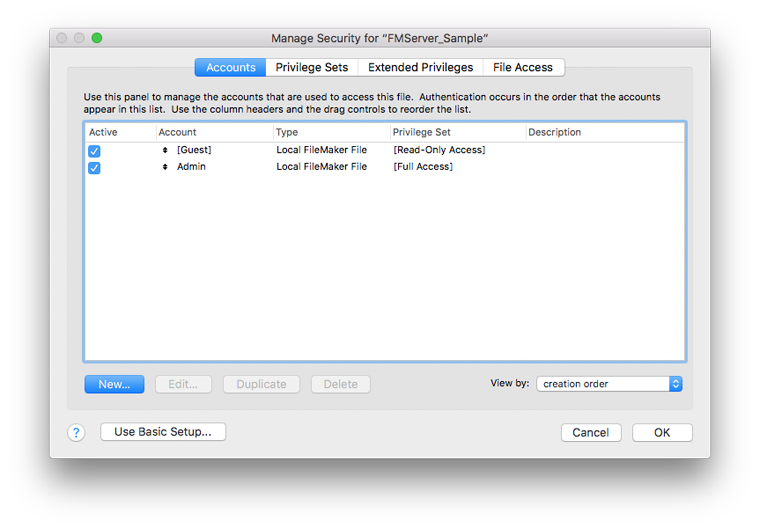
- FileMaker requires that at least one user have full access to the database so we are going to create that account first.
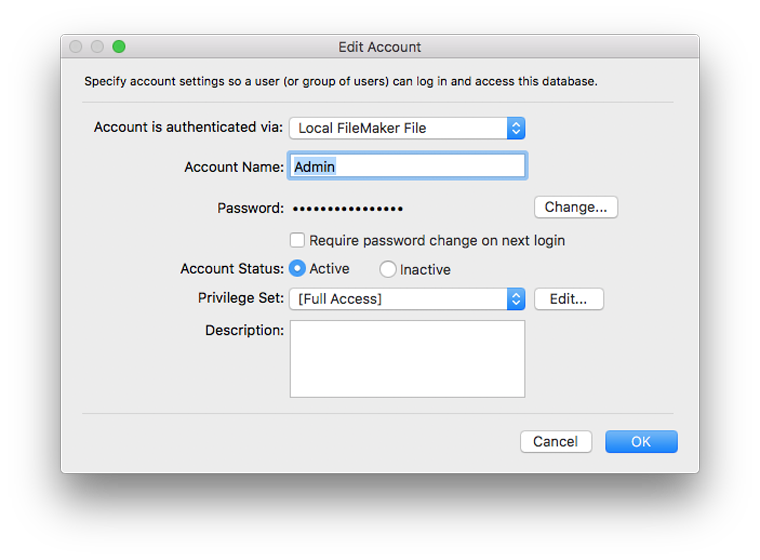
- Enter the following in the new account screen and click "OK"
- Account is authenticated via - FileMaker
- Account Name - your_account_name (i.e. Admin)
- Password - your_password (please remember that your database is only secure as your password. Test the strength of your password here.)
- Account Status - Active
- Privilege Set - [Full Access]
- Description - your_description (this is optional)
- Now that we have created our full access account we now have to make sure that we give that user the access we want to the database.
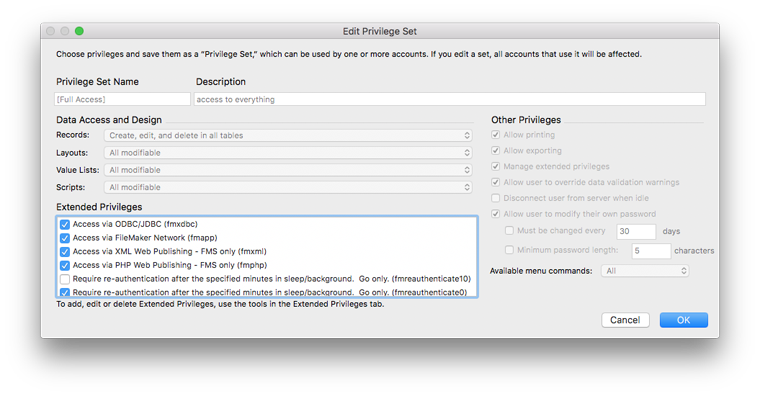
- From the "Manage Security" window select the "Privilege Sets" tab.
- Here you will see the privilege set that we used called "[Full Access]". Click on this item and click the "Edit" button.
- The "Edit Privilege Set" window will display. Click the checkboxes to select the type of access you want for this user. Most users will only need to select the "Access via FileMaker Network (fmapp)". This will give this user the ability to open the database using the "Open Remote" option in FileMaker Pro. Another common option is the "Access via Instant Web Publishing (fmiwp)" This option will let users who do not have the FileMaker Pro Application installed on their computers the ability to access the database via a web browser. Instant web publishing is a very large topic and is discussed in another knowledge base article. Click the "OK" button when you are finished.
- You can now close the "Manage Security" window by clicking the "OK" button.
- You can find out more about FileMaker security by clicking here. You are now ready to upload your database for hosting. Before uploading the database you need to make sure that the database is not open in FileMaker Pro. Please close the database or quit the application before uploading. You are now ready for step 4!
